Showing posts with label Flywheel Bike. Show all posts

Saturday, February 15, 2014

IAP and AIBD Conclusion


AIBD Crew 2014
This year's AIBD season came to an exciting conclusion with the successful completion of all 5 bike projects!  An amazing amount of work went into the swingbike, shopping cart bike, mini-recumbent, batmo-bike/tandem, and desk charging station, and all of the groups had moving/functioning bikes in time for the final class bike party, which was definitely an improvement from the previous year.

Our final day of class began with an exciting guest lecture from Professor David Gordon Wilson, who wrote the Bicycling Science book that we used to teach the class, and we got to hear about some of his bike building experiences and stories.  Afterward, we took all the completed creations out into the alley for the year end bike party.  I ended up throwing together a quick project the night before as well just for kicks, modifying an old children's bike that Jack found in the basement.  This year's IAP class ended with this wacky drag race of all the creations down the alley!


The class was really awesome this year, and made for a great IAP.  The students did an amazing job, and ended up with some really well-made and original creations.  Documentation for all the completed projects can be found at the official class website: aibd.mit.edu

Can't wait for IAP next year and a new season of AIBD bicycle building!

Flywheel Bike Digressions

We had gone up to the lab on the final day before the last AIBD class with a long list of tasks to complete on the flywheel bike, but ended up with a new bike instead...

I want to do some comparative tests with different free wheels to see the difference between the cast iron free weight disc and a ring of concrete poured in a bike tire.  I wanted to find a small rear wheel that would work for the concrete idea to start piecing together the system, since the 20" wheel that I had used to size the frame was missing spokes and rusted.  I dug up an old children's bike in storage with 12.5" wheels that were a bit on the small side for our flywheel, but served as a good starting point.  I ran some chain from the front bottom bracket to the wheel to make sure it lined up properly.


I rounded the corners on the flat steel piece on the top tube in preparation for mounting the seat tube.  Yet, when I took off the white wheel to do the welding directly above it, I had some second thoughts about the 12.5" rims.  Nick and I put the wheel back on the miniature bike from which it came, and gave it a try.  It was hilarious seeing big Nick trying to balance on the tiny bike frame.  


I could ride the bike decently well, although it was definitely not comfortable or effective.  So we took an hour on the welder, and converted the tiny bike into yet another steel monstrosity.  We began by extending the seat post by butt welding it to about a foot and a half of 1" steel tube: 


Seat Tube


Next up was the handlebars, which also got jacked up with more 1" steel pipe.  I cut the handlebars off from the stem that fit into the head tube, and then I cut the tube at about a 45 degree angle and welded the handlebars to it at a slight angle.  I wanted the handlebars angled farther forward out over the front wheel so that there was actually room to pedal and steer at the same time.


I took the stem from the handlebars that bolted into the head tube and welded the top of a seat tube at a slight angle in order to move the handlebars even farther over the front wheel.  The steel tube from the handlebar extension would fit into the extra seat tube.  They met at a slight angle, but still required filling in a lot of open space with weld.  Eventually, it held up pretty well, but the seat tube was meant for a slightly thicker seat post, so I put a small bit of rubber around the steel where it fit into the seat post in order to make a snug fit.


This resulted in the only slightly modified children's bike on stilts...eloquently dubbed the Cherry Chopper by Nick.  It made for a fun ride on the 8" wheels, tiny single speed with coaster wheels.  


The most notable complications were that the angle of the seat post on the pink bike put the seat over the back of the rear wheel after the extension.  This combined with the wheels being very close together allowed for the rider to very easily flip backward if not careful to put their weight forward.  Also, despite the angled handlebar extension, steering still required special care so as to not allow the handlebars to hit the rider's knees while pedaling.  It was a lot of fun to ride though, here're Carson and Nick getting the hang of it:


After all the shenanigans, we touched up a couple things on the flywheel bike frame, including welding enough of a seat tube to mount the seat on top, as well as slapping on a rear derailleur.  The next major steps will be finally making the flywheel, and creating a clutch to link it to the bike wheel.  I'll be sure to keep updating all the progress!


Thursday, January 30, 2014

Flywheel Bike is Happening!

With this year's AIBD season reaching its final week, everyone's been frantically working in the shop to complete their designs.  I wanted to go ahead and get some welding work done on the flywheel bike too, so Nick and I went over to the lab late the other night and pounded out the frame.

I have enough bicycle parts in the dorm now to clutter up not only my own room, but my friend's across the hall as well...
Friend's room across the hall
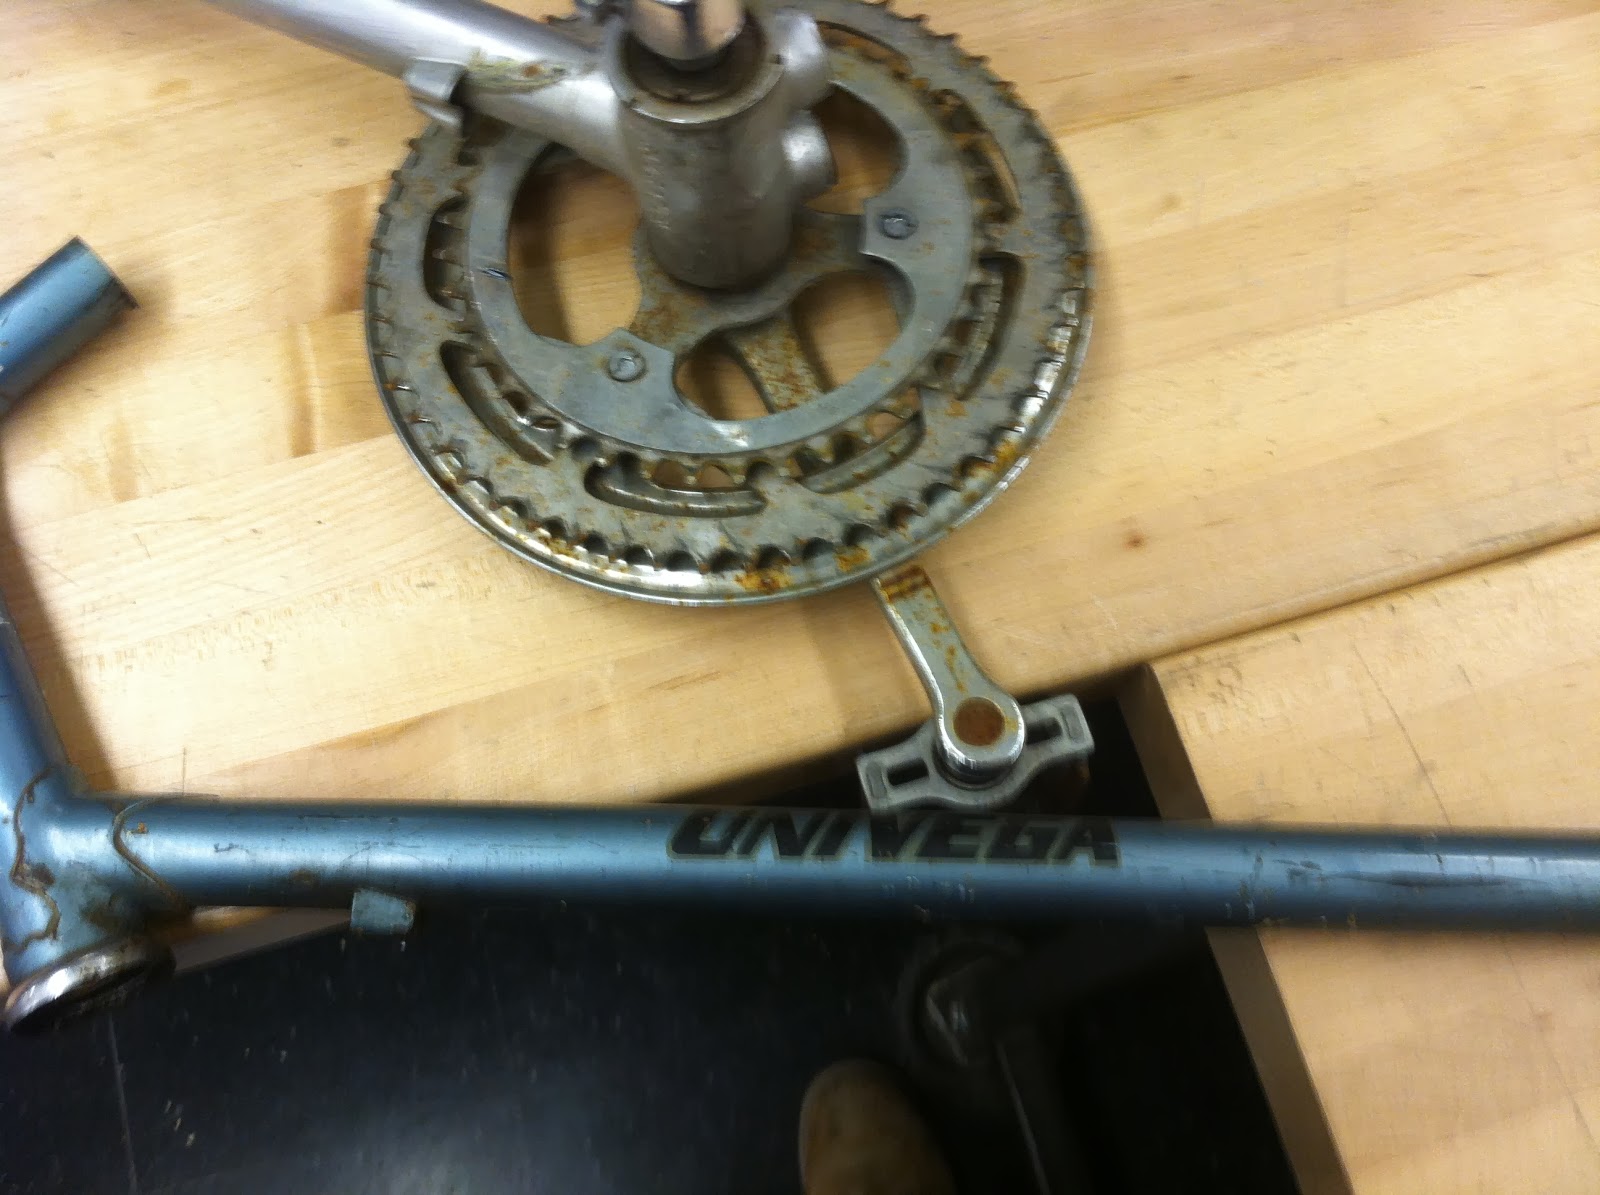
I went over and dug up two old Univegas that I had picked up over winter break.  It had been very challenging at times to make very dissimilar frames compatible in projects such as the tank bike, so I figured that it'd be nice to have two of the same type of frame.  I stripped both of the bikes down to nearly just the frame so that I could more easily sling them over my shoulder and haul them up to the lab on the drift trike.


I started laying out the frame design by just laying the bike parts out on the table.  I hadn't thought too much about how to configure everything, but I basically wanted to combine the two frames to make a single, larger frame with a larger main triangle in which we could mount the flywheel.  The silver bike had the headset fully intact, so I used that one in the front.  Ideally we would keep both bottom brackets with the pedals on the front one so that the rider would pedal in the front.  Chain would be on the right side of the bike to separately connect the front sprocket to the flywheel and then the rear sprocket to the rear wheel.  This way the clutch system would only need to connect the flywheel to the rear bottom bracket on the left side of the bike.
Combining the two frames would require removing the rear triangle on the silver bike and cutting off the head tube and down tube on the blue frame.


Hacksaw Cuts

Angle Grinder Cuts
New Layout Configuration:

I used a 20" bike wheel to roughly size out a location for a flywheel.  This was much larger than the cast iron weight that we had, and should be more than enough space for most flywheels we'll try out.  To complete the frame by connecting the two bottom brackets, I cut the remaining down tube from the blue frame down to size, and experimented with using the hole saw on the drill press to miter the tube.


In order to make sure that both frames lined up and were in the same plane, we clamped them down to a  long 2x6" board.  Connecting the top tubes also required butt welding them together, so we constrained the tubes in a collinear arrangement by clamping them along a piece of angle iron.  Then we just clamped up the bottom bracket-connecting tube and welded it all up with the MIG welder.


Nick Welding


It came out pretty well, and very long.  It's funny how it looks broken because you're accustomed to seeing a straight down tube, and now it looks like the entire bike frame got bent at the front bottom bracket.  It should have plenty of room to contain the flywheel in the now expanded main triangle.


Next, we just had to mount the flywheel to the frame.  I opted to use the stays from the silver frame that I cut off to mount the flywheel, as the dropouts would allow us to interchange different types of flywheels that we came up with.  I wanted to mount the stays hanging down from the top tube on the frame, so that the flywheel would set down in the dropouts.  I couldn't find a good constraint for the wheel to help us line it up perfectly centered in the plane of the bike frame, so clamped it in place and spent a while spinning the wheel and just making slight adjustments until it looked good enough.  As long as the chain won't come off later, we should be alright. 


We tried to keep it pretty sleek, so that when you're pedaling your legs don't hit anything on the structure supporting the flywheel.  The extra additions to the frame indeed made the center of the bike much wider than usual.  Where there were sections of tube sticking up, we crimped the ends with a pair of channel locks and bent it to the top tube of the bike by hitting it with a hammer.  Then we just welded it to the frame, which made the flywheel support stays durable and without exposed, sharp angles.


And that's about it for day 1 on the frame, now we have a very unconventional tricycle...
Moving forward, we just need to make the flywheels, by machining our cast iron weight or by filling the inner tube on the wheel with concrete.  We're also going to mount the seat right above the flywheel, where there's that flat metal piece in the picture, and then we just need to work out the clutch/power take off system to engage the flywheel with the back wheel.


Friday, January 24, 2014

Heavyweights

I'm toggling back to the flywheel bike idea now...after creating some massively heavy and inefficient contraptions like the tank bike, I'm interested in seeing if we'll be able to succeed in effectively using some extra weight to our advantage.

I got started off by just finding something heavy.  I was back home not too long ago, and brought up one of our old York free weight plates.  At 25 pounds, it fits our necessary qualifications of being heavy and round, as well as being steel should we need to weld to it.  

Now we have to come up with a way to mount it within the bike frame in such a way that it easily and smoothly spin while being driven by bike chain.  Roberto and I spent a while thinking and drawing up ways in which we could use a hub from a bike wheel to mount it to dropouts and drive it with a freewheel.


For the sake of time and ease, we eventually decided to try just fitting bearings on the inside of the hole in the plate and welding the freewheel directly to the side.  We might need to machine a piece to center the freewheel on the plate to assure that it's welded in the correct spot.  This configuration would effectively make the plate function as the hub itself, with the freewheel attached to the side.  I ordered some ball bearings on McMaster that should get here tomorrow so we can try it out.


I'm also still drawing up the exact layout for a belt-driven clutch system similar to the power take off in lawn mowers that would give the final connection between the flywheel and the rear wheel on the bike.  It should be fairly straight forward once we pick up a couple pulleys and some v-belt.